


Seasonal home preparation works best as a transition, not a frantic weekend of unrelated chores. The goal is to notice how changing temperature, rain, wind, daylight, and household routines will affect the building and the people in it. A short inspection done before conditions become demanding gives you time to clean, adjust, schedule help, or simply watch a questionable area.
This is not a universal calendar. A coastal apartment, a desert house, and a cold-climate rental face different transitions. Start with the next likely conditions in your location and the responsibilities assigned by your lease, association, or building management. Then focus on places where weather meets the home, systems that will soon be used differently, and supplies needed when normal routines are interrupted.
Define the season you are preparing for
Instead of treating “fall maintenance” or “spring cleaning” as fixed packages, write a one-sentence description of the transition ahead. It might be “hot, dry weather changing to cooler nights and rain,” or “freezing conditions ending as heavy spring runoff begins.” That statement keeps the plan relevant. It also prevents time spent on generic tasks that do not apply to your home.
Check your local government or weather service for the hazards typical of the coming period. Note whether your household will use heating, cooling, outdoor water, windows, fireplaces, or storm protection differently. If you live in a managed property, review notices and report building-envelope or shared-system concerns rather than altering common elements yourself.
Create three categories: items you can inspect, items you are responsible for maintaining, and items that require an owner, manager, or qualified professional. This division is especially useful for renters. A stained ceiling may be easy to inspect and photograph, but the source of water and the building repair are not automatically a tenant project.
Use a transition table instead of a generic checklist
| Area | Observe | Practical response | Escalate when |
|---|---|---|---|
| Roofline and drainage | Visible debris, overflow marks, loose components, pooling | Inspect safely from the ground and clear only accessible areas you are responsible for | Work requires roof access, repairs, or shared-building action |
| Doors and windows | Drafts, water staining, failed seals, difficult operation | Clean tracks, confirm locks, and use approved weather-sealing measures | Frames are damaged, leaking, or cannot close securely |
| Heating or cooling | Unusual sound, odor, weak airflow, warning indicator | Follow the manual for user maintenance and schedule normal service if due | There is smoke, combustion concern, electrical trouble, or persistent malfunction |
| Outdoor areas | Loose items, blocked paths, damaged branches, drainage changes | Secure belongings and restore clear, stable access where authorized | Trees, power lines, structures, or major drainage are involved |
| Emergency readiness | Expired items, changed household needs, missing documents | Update the kit and contact plan for the likely local disruption | Official guidance requires evacuation or specialized preparation |
Begin outside without taking unnecessary risks
Make a slow ground-level circuit around the home or, in an apartment, inspect the balcony, exterior door, accessible windows, and any assigned storage area. Look for new gaps, staining, peeling sealant, loose screens, blocked drains, vegetation touching the structure, and objects that could move in wind. Compare questionable areas with earlier photos if you have them.
Do not climb onto a roof as part of a casual seasonal inspection. Binoculars or a camera zoom can reveal obvious damage from the ground. Roof surfaces, tall ladders, trees near power lines, damaged masonry, and exterior electrical components belong with qualified professionals. Report shared-building concerns through the property’s established channel and keep the date, description, and photos.
Check water’s intended path
Observe where rain or melting snow should travel: roof edge, gutter, downspout, drain, swale, or approved discharge point. Look for marks suggesting overflow or water collecting against the building. Clean only what is safely accessible and within your responsibility. Never redirect water onto neighboring property, a walkway, or a location prohibited by local rules.
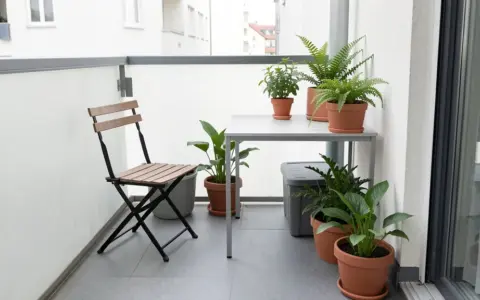
On balconies and patios, clear ordinary debris from accessible drains without removing protective components. Keep planters and furnishings from blocking drainage. If standing water persists, the surface slopes toward the building, or staining appears indoors, document it and contact the responsible party.
Secure what the next season can move
Outdoor chairs, lightweight planters, umbrellas, tools, toys, and decorations may need a storage or anchoring plan before strong weather. Use the manufacturer’s method and building rules rather than improvised ties that create another hazard. Make sure stored items will not block exits, utility equipment, or required access.
Inspect doors and windows from both sides
Open, close, latch, and lock each accessible window and exterior door. Clean tracks and sills so debris does not disguise a mechanical problem. Look for daylight through unexpected gaps, brittle or displaced weatherstripping, condensation between panes, soft material, and water marks. A difficult window may need adjustment or repair; forcing it can damage hardware.
To investigate drafts, use your hand on a windy day or a removable tissue near the frame. Avoid open-flame tests. Before air sealing, identify the opening and account for the home’s ventilation and equipment needs. Follow product instructions, lease terms, and building requirements; do not seal intentional vents or combustion-air openings.
Switch screens and storm components only if that is part of the product’s intended use and you can do it safely. Label removed pieces by room, clean them gently, let them dry, and store them flat or upright as their construction requires. Keep emergency egress windows operable and unobstructed.
Test comfort systems before demand peaks
Run the heating or cooling mode before the first extreme day, following the system manual. Listen for new rattles, grinding, repeated cycling, or other unusual behavior. Notice weak airflow, persistent odors, leaks, and warning indicators. A brief smell when a system first operates after a long pause can have several causes; if you suspect burning, electrical trouble, fuel, or combustion gases, stop and follow emergency or professional guidance rather than diagnosing by internet description.
Complete only owner-approved user maintenance. That may include cleaning a return grille or changing a filter when the manual assigns that task and specifies the correct type and orientation. Do not remove service panels or bypass interlocks. Schedule qualified service for fuel-burning equipment, refrigerant systems, electrical faults, or anything outside the user section of the manual.
Keep airflow paths usable
Move furnishings, curtains, and stored goods away from registers, radiators, returns, and equipment clearances as applicable. Vacuum accessible grilles with the system off if the instructions allow. Never place wet materials on a heat source, and do not use an oven or outdoor appliance to heat indoor space.
Ceiling fans can help with comfort when used as intended, but direction controls and seasonal recommendations vary by model and room. Consult the fan manual, turn power off before cleaning, and use stable access equipment. A wobbling, loose, or damaged fan needs attention rather than a seasonal direction change.
Review alarms and combustion safety
Follow the manufacturer’s instructions and local requirements for testing and maintaining smoke and carbon monoxide alarms. Check their status indicators, physical condition, and replacement information. Do not paint over, cover, relocate, or disable an alarm because it is inconvenient. If a device chirps or reports a fault, identify the model and follow its instructions.
The U.S. Consumer Product Safety Commission’s carbon monoxide fact sheet warns that carbon monoxide is odorless and can come from fuel-burning products. If an alarm sounds, treat it according to the alarm instructions and official emergency guidance; do not assume opening a window or resetting the device proves the space is safe.
Keep vents, flues, and equipment areas free from belongings while preserving required clearances. Changes to a vent, chimney, fuel line, or hardwired alarm system require appropriate expertise. Renters should report missing or defective required alarms promptly in writing.
Reset indoor spaces for changing routines
Seasonal preparation is partly logistical. Put frequently used outerwear, shoes, umbrellas, sun protection, or other climate-specific items near the departure point. Move off-season items out only after cleaning and drying them. Avoid packing closets so tightly that vents, alarm devices, electrical panels, or access points disappear behind storage.
Adjust bedding in stages rather than replacing everything on a date. Keep one flexible layer accessible for unpredictable nights, and inspect stored textiles for moisture or pests before they return to the bed. Our guide to storing linens in limited space can help keep those rotations manageable.
At the same time, review lighting in entrances and work areas as daylight shifts. Clean shades and fixtures only after turning them off and allowing them to cool. Replace failed bulbs with products compatible with fixture instructions. For a broader plan, see our room-by-room guide to better lighting at home.
Prepare for interruptions that fit your location
A household kit should reflect likely local disruptions and the people, pets, medications, accessibility needs, and communication tools in the home. The federal Ready.gov emergency kit guidance provides a starting framework, but local emergency management instructions should shape the final contents. Check expiration dates and replace used, damaged, or unsuitable items.
Keep important contact information available outside a phone that may lose power. Know how your household receives official alerts and where you would go if told to evacuate. Do not store supplies where seasonal heat, cold, moisture, pests, or children can compromise them. Medications, batteries, fuels, and specialty equipment all require their own label and professional guidance.
Preparation also means maintaining access. Keep exits, flashlights, mobility aids, pet carriers, and weather gear easy to reach. If someone relies on powered medical equipment, make a plan with health care providers and local emergency resources rather than assuming a general-purpose battery will work.
Common seasonal preparation mistakes
Starting with purchases instead of observations
Buying bins, sealants, filters, or emergency gadgets before inspecting the home often produces wrong sizes and unused supplies. Walk the property, identify the actual condition, and consult manuals or responsible parties first.
Treating a checklist as permission to perform repairs
A checklist can remind you to inspect a roofline or heating system; it does not make every repair a do-it-yourself task. Height, electricity, combustion, structural damage, and shared building components require clear authority and suitable expertise.
Sealing every opening you can find
Some openings provide drainage, ventilation, or combustion air. Indiscriminate caulk or foam can conceal water or affect equipment. Identify the component and follow building and product guidance before sealing it.
Waiting for extreme weather to test equipment
Discovering a fault during the first very hot or cold day leaves fewer options. A supervised test under moderate conditions creates time to read the manual, contact management, or arrange qualified service.
Forgetting to close the loop
Photos and notes are useful only if concerns become actions. Assign each issue a next step: monitor, clean, order the specified part, report, or schedule service. Record completion so the same uncertainty does not return next season.
Frequently asked questions
How often should I do seasonal home preparation?
Use meaningful local transitions rather than a universal schedule. Review the home before a major change in temperature, precipitation, wind, wildfire conditions, or household use. Some regions have several important transitions; others may need a focused review before one demanding season.
What should renters include?
Renters can inspect accessible areas, test devices as instructed, organize supplies, and report leaks, damage, or system faults. Consult the lease before changing hardware, sealing openings, servicing equipment, or working on exterior and shared elements.
Do I need a separate checklist for every season?
Not necessarily. Keep one core inspection covering exterior exposure, openings, comfort systems, alarms, supplies, and indoor routines. Add a short module for the next local condition, such as freezing weather, heavy rain, heat, or smoke.
What if I find a problem I cannot identify?
Photograph it, note when and where it appeared, avoid disturbing it, and contact the responsible manager or qualified professional. Leave immediately and follow official guidance if there is an immediate threat such as fire, suspected gas, carbon monoxide alarm, structural movement, or dangerous electrical behavior.
Final takeaway
Seasonal home preparation is an observation-and-response system. Define the conditions ahead, inspect where weather and routines are changing, and act only within your responsibility and competence. Test essential systems early, keep official emergency guidance close, and document what needs professional attention. A focused transition protects daily function far better than a long generic list completed without context.