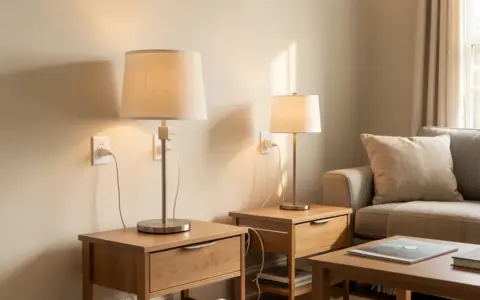


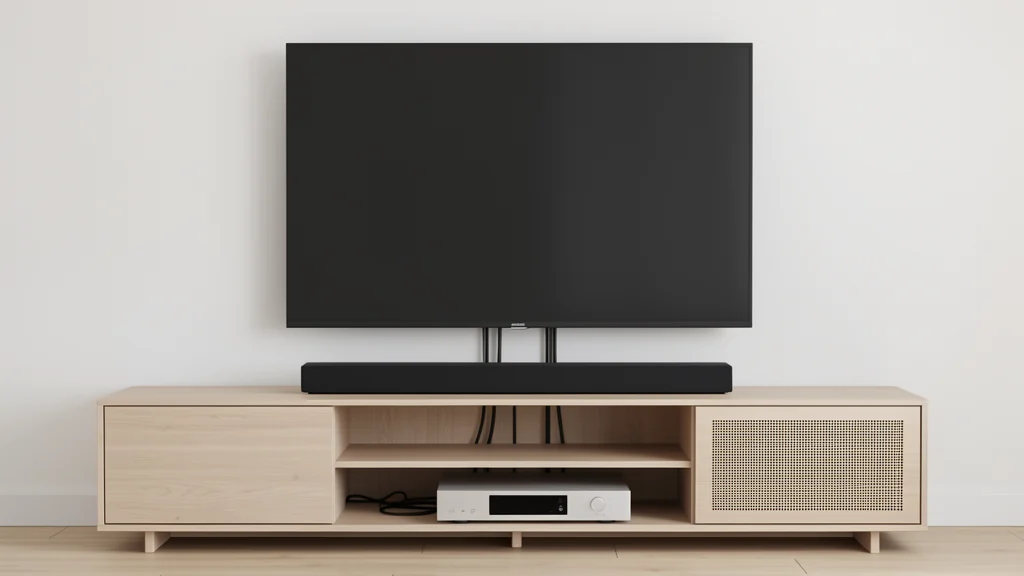
A simpler home entertainment setup is not necessarily the one with the fewest devices. It is the one household members can start, adjust, and shut down without tracing mystery wires or moving heavy equipment. The best layout gives every screen, speaker, source device, controller, and network connection a defined job. It also leaves enough access for ventilation, cleaning, troubleshooting, and future changes.
Begin with the room and the routines, not a shopping list. Existing equipment may already cover the household’s most important activities. Manuals matter because mounting limits, ventilation clearances, supported connections, power requirements, and cleaning directions vary. This guide is brand-neutral and cannot approve a wall, mount, adapter, power accessory, or wiring route for a particular home. Follow the instructions for every device and accessory, respect lease and local requirements, and use a qualified installer or electrician when the work exceeds a safe, permitted household task.
Start with a one-page connection map
List the activities the room must support: broadcast or streaming video, movies from a disc player, console gaming, music, video calls, or occasional laptop use. Then list the equipment currently involved. For each item, write its purpose, power source, connection to the display or audio system, network connection if any, and the control normally used. A basic sketch is enough. The goal is to reveal duplicate jobs and unclear dependencies.
Choose a default path for the household’s most common activity. Record which input to select, which control changes volume, and what must be powered on. Secondary activities can have their own short path. This approach simplifies behavior without assuming that automatic input switching, a universal remote, or one-control power behavior will work across all equipment.
Plan the room around people and access
Check the screen from the seats people actually use. The picture should be visible without repeated neck extension, twisting, or leaning around furniture. There is no universal screen height or viewing distance: screen size, room depth, seating posture, vision needs, captions, and manufacturer guidance all matter. Test the proposed position with removable tape or a cardboard outline before drilling or moving heavy furniture. If household members have mobility, sensory, hearing, or vision needs, place controls within comfortable reach and preserve clear pathways.
Speakers should not create trip hazards or block vents, doors, stairs, or walking routes. Avoid placing controls where someone must reach behind a hot component or stretch across a stand. Keep frequently used ports accessible if the household connects a laptop, headphones, or assistive device. A setup that looks perfectly concealed but requires lifting the display for every change is harder to maintain and more likely to be disturbed unsafely.
Make mounting and furniture support a separate safety decision
Do not treat a wall mount as cable management. Confirm that the mount is intended for the device’s size, weight, attachment pattern, and orientation, and that the mounting surface and fasteners are suitable for the actual wall construction. The television or display manual and mount instructions must agree. Stud locations, masonry, metal framing, damaged surfaces, and concealed utilities can change the job. When any condition is uncertain, stop and use a qualified installer rather than improvising anchors or hardware.
For a stand-based screen, use stable furniture designed for the load and follow any supplied anti-tip instructions. Keep heavy components low, avoid overhanging edges, and consider children, pets, floor vibration, and traffic through the room. Never assume a piece of furniture is safe because the device appears to fit on top. Do not drill into rented walls or route cable inside a wall without authorization and a method that complies with applicable rules.
Protect ventilation and service space
Entertainment components convert some electricity into heat. Find the intake and exhaust openings on each unit, then use the manual’s clearance and orientation requirements. Do not stack components unless their instructions and the supporting furniture permit it. A closed cabinet may look tidy while trapping warm air, and a decorative object can block a vent without appearing close to the electronics.
Leave a practical route for air to enter and exit the furniture. Heat around one component does not prove a fault, but unusual heat, odor, discoloration, buzzing, repeated shutdowns, a swollen battery, damaged casing, or a hot plug is a reason to turn the equipment off if it is safe to do so and seek manufacturer or qualified professional guidance. Do not open a power supply or component to investigate.
Service space is equally important. You should be able to reach plugs, see labels, remove dust as directed, and replace one cable without pulling the entire system forward. Photograph the open back of the cabinet before closing it. If ventilation depends on a powered fan, understand what happens when that fan stops and maintain it according to its documentation.
Use this decision table before arranging equipment
| Part of the setup | Decision to make | Manual or physical check | Simpler fallback |
|---|---|---|---|
| Display | Wall-mounted or supported on furniture | Weight, attachment pattern, surface, stability, ventilation, and sightline | Use a suitable stable stand until mounting conditions are verified |
| Audio | Display speakers or separate audio system | Supported ports, control behavior, placement, and cable route | Use the reliable built-in audio path while troubleshooting |
| Source devices | Which devices serve distinct activities | Required inputs, resolution or audio support, updates, and power | Keep one proven source connected and add others one at a time |
| Network | Wired or wireless connection where supported | Port access, signal quality, update process, and account needs | Use offline or local functions that the manuals confirm |
| Controls | Separate controls or supported shared control | Pairing, batteries, input selection, and accessibility | Label the original controls and keep a short operating card |
Build a deliberate power path
Record the electrical rating of each component from its label or manual and follow the instructions for any listed surge protector, power strip, battery backup, or outlet accessory. Do not exceed ratings, defeat a grounding feature, daisy-chain power strips, or conceal flexible power cords where heat or physical damage can go unnoticed. Cords should not run under rugs, through doorways, across walking paths, or where furniture pinches them. A loose outlet, damaged cord, cracked adapter, scorch mark, or repeatedly tripping protective device needs qualified attention rather than another accessory.
Separate “off” from “not drawing power.” Some devices maintain network, update, clock, or quick-start functions in standby. Review energy settings in each device rather than assuming one setting fits the entire system. Features such as fast startup, bright status lights, screen savers, and automatic wake may be unnecessary for the household. Use timers or switched accessories only when the equipment manuals allow them and an unexpected loss or restoration of power will not create a problem.
For phones, controllers, and rechargeable accessories, a separate household device charging station can keep small batteries and loose charging leads away from the warm equipment cabinet. Use compatible charging equipment, keep it ventilated, and remove damaged or unusually hot items from service.
Manage cables without making them inaccessible
Disconnect and reconnect only after following shutdown instructions. Work on one cable at a time. Apply a simple label at both ends using the device name and port purpose, such as “display audio out” rather than a color alone. Color can still help, but text on the physical label should be readable to the household and should not cover ratings, ventilation openings, or release tabs. Update the connection map as each path is confirmed.
Use broad hook-and-loop ties or an organizer intended for the cable type, keeping bundles loose enough to avoid crushing jackets or forcing sharp bends. Preserve strain relief and a modest service loop near movable equipment, but do not leave coils where they block air or snag feet. Keep plug-in power connections accessible. If power and signal cables must cross, a short, orderly crossing is often easier to inspect than a dense mixed bundle, but follow device and cable guidance for separation and interference concerns.
Surface raceways can improve appearance when they are suited to the cable and installation location. In-wall routing is not simply a more hidden version of a surface route: cable ratings, wall cavities, fire blocking, electrical separation, and local rules can apply. Never place an ordinary detachable power cord inside a wall. Use an electrician or qualified low-voltage installer when the route requires openings, concealed power, or unfamiliar construction.
Simplify connections and controls in stages
With the display and basic audio working, connect one source device and test its normal activity. Confirm picture, sound, volume control, captions if used, and a complete shutdown and restart. Add the next source only after the first path is documented. This isolates faults and prevents a failed cable or setting from becoming a room-wide mystery.
Place networked entertainment devices where connectivity is stable, but do not move the household router into a hot or enclosed cabinet just to shorten a cable. If streaming fails in this room while other locations work, diagnose the coverage problem with the steps in this guide to fixing Wi-Fi dead zones. A wired connection may be useful where supported and practical, but it still needs a safe route and properly functioning network equipment.
Follow a controlled setup sequence
- Photograph and inventory. Capture existing connections, list equipment, and save accessible manuals before moving anything.
- Remove nonessential items. Disconnect one identified device at a time, then confirm that required activities still work.
- Set furniture and sightlines. Check stable support, viewing comfort, paths, control reach, and access to outlets.
- Verify mounting. Match the display, mount, surface, hardware, lease terms, and instructions; escalate uncertain work.
- Arrange for airflow. Position components using their required orientation and clearances, with room for cleaning and service.
- Establish power. Inspect cords and outlets, confirm ratings, and eliminate pinched, hidden, or trip-prone routes.
- Connect and label in layers. Test the display, audio, and one source before adding each remaining device.
- Write a quick-start card. Record the default input, controls, normal indicator behavior, shutdown steps, and what not to unplug.
Test the finished arrangement from a cold start, not only while everything is already awake. Ask another household member to follow the quick-start card without coaching. Their hesitation will reveal missing labels or unclear steps. Also decide what remains usable when internet service is unavailable; the planning approach in the internet outage backup guide can help separate local functions from services that depend on a provider or account.
Maintain the setup instead of repeatedly rebuilding it
Keep the map, photographs, manuals, purchase or installation records, spare approved hardware, and quick-start card together. Review the setup after a move, new device, furniture change, electrical work, or unexplained shutdown. Remove abandoned cables instead of leaving them in the bundle “just in case,” but identify each one first.
At an interval suited to the room and device instructions, look for dust buildup, blocked vents, loose mounts, furniture movement, pinched jackets, pet chewing, heat damage, battery problems, and controls that no longer operate reliably. Power down and unplug only as directed before cleaning. Use the recommended method and avoid spraying liquid into equipment. A vacuum, compressed air, solvent, or cloth that is safe for one surface may be wrong for another.
Review accounts and software on connected devices too. Install supported updates, use unique passwords, enable multifactor authentication when available, remove old household or guest access, and minimize optional data collection. Network separation can be helpful when practical and maintainable, but it should not prevent required updates or make the system impossible for the household to support. Before selling or recycling equipment, follow the manufacturer’s process to sign out, erase personal data, remove the device from accounts, and handle batteries responsibly.
Frequently asked questions
Should every entertainment cable be hidden?
No. A visible cable in a secure surface channel may be safer and easier to inspect than an unapproved concealed route. Prioritize correct cable type, ventilation, strain relief, service access, and a path that avoids heat, pinching, and trips. Concealed power or in-wall work may require rated materials and qualified installation.
How much ventilation does a media cabinet need?
There is no single clearance for every component. Use each manual’s orientation and clearance rules, account for several heat-producing devices in one space, and make sure air has an entry and exit path. Repeated heat-related shutdowns or unusual temperatures call for investigation, not a smaller decorative gap.
Can one remote control everything?
Sometimes, but not universally. Shared control depends on supported devices, connections, settings, and reliable behavior after power or input changes. Test the feature before retiring original controls, and keep a plain operating card as the dependable fallback.
What is the easiest way to reduce cable clutter?
Remove equipment that no longer serves a defined activity, shorten the connection map, label both ends, and group cables loosely by destination. Do not solve clutter by tightly compressing bundles, hiding damaged cords, blocking vents, or creating an unapproved in-wall power route.
A simpler system is one the household can understand
A good home entertainment setup supports the room without dominating it. People can see and hear comfortably, controls are reachable, equipment is stable, air can move, power paths are inspectable, and every cable has a purpose. The connection map and quick-start card preserve that simplicity when settings change or a new device arrives.