


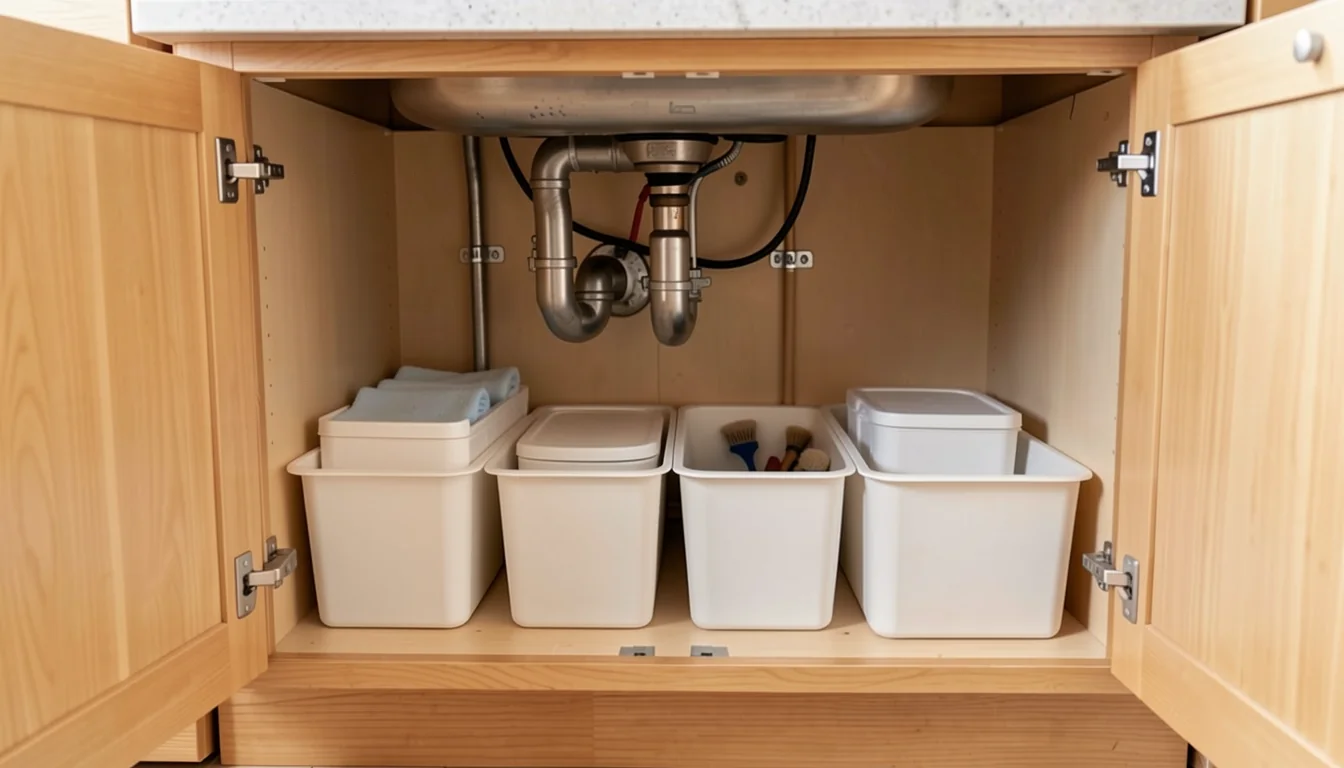
Under kitchen sink organization has to solve a different problem from an ordinary cabinet. The space contains plumbing, may be exposed to drips, and often attracts products that should not be mixed or left within easy reach of children or animals. A tidy photograph is therefore a poor goal by itself. The better goal is a cabinet where you can see the pipes, retrieve one item without knocking over three others, and notice moisture before it becomes a larger problem.
Start with the cabinet you have, not a shopping list. Its pipe layout, disposal unit, shutoff valves, shelf material, door swing, and household risks determine what belongs there. Some kitchens can safely hold a small group of frequently used supplies. Others work better with almost nothing beneath the sink because a curious pet opens doors, a toddler visits the kitchen, or the plumbing needs unusually generous access.
Empty the cabinet and read the space
Remove everything and place it on a protected counter or floor where children and pets cannot reach it. Keep bottles upright as you work. Do not combine partial containers, pour products into unmarked jars, or open packages merely to inspect them. If anything is leaking, corroded, swollen, or missing directions, isolate it from other items and follow its label or your local household hazardous-waste instructions.
With the cabinet empty, inspect rather than immediately clean. Look at the supply lines, drain connections, disposal, shutoff valves, electrical outlet, cabinet floor, back wall, and hinges. A fresh water mark, soft panel, damp odor, mineral deposit, or active drip deserves attention before organizers go in. Drying the surface and hiding it beneath a liner does not address the source. Renters should document concerns and use the maintenance process required by the lease or building.
Clean the empty cabinet with a method suited to its finish. Laminated panels, painted wood, unfinished composite material, and removable plastic liners tolerate moisture differently. Follow the cabinet maker’s care guidance when available, avoid soaking seams, and let the interior dry fully. If there is visible mold, sewage, an electrical concern, or a leak you cannot identify, pause the project and contact the appropriate building manager or qualified professional.
Decide what earns space below the sink
Create three groups: frequent sink-related supplies, items that belong elsewhere, and items requiring a disposal decision. The first group might include dishwasher detergent, dish soap refills, gloves, a small number of cloths, trash bags, or a brush. The exact list depends on how your kitchen works. Keeping a product here only makes sense if its label permits the location and everyone who might access the cabinet can be protected.
Move duplicates and occasional specialty products to a suitable utility location rather than forcing them around the drain. Food, pet food, medication, paper goods that absorb leaks, and anything used on the body generally deserve separation from household chemicals. Do not store an item beneath the sink simply because it is vaguely related to cleaning. Give space to the things used at this particular work zone.
Read every product label before assigning a home. Storage temperature, ventilation, child-resistant packaging, upright orientation, and separation directions matter more than matching containers. Never assume two cleaners can share a decanted bottle or be combined because they serve similar surfaces. Keep products in their original containers with directions intact. If the label calls for locked or otherwise restricted storage, a basic under-sink cabinet may not qualify.
Map fixed obstacles before choosing organizers
Measure the cabinet opening as well as the interior. Hinges, center stiles, pipes, and a door frame can prevent a wide bin from entering even when it would fit once inside. Sketch the floor from above, marking plumbing penetrations and the area needed to turn each shutoff valve. Also note equipment manuals that require clearance around a disposal, filtration unit, instant-hot device, or electrical component.
Preserve a direct route from the opening to service points. A repair should not require balancing bottles on the kitchen floor while water is escaping. Lightweight handled bins can occupy usable side areas because they lift out as units. Avoid permanent shelves, tension rods, or stacked drawers that press against supply lines, block a valve, trap a cord, or make a slow drip difficult to see.
If you use a liner, choose one compatible with the cabinet and keep it removable. A shallow, light-colored tray beneath products can make drips easier to notice, but it is not leak protection for the plumbing itself. Do not run material up around pipes in a way that conceals the cabinet floor. Periodically lifting the liner is part of the system.
Build zones by risk and action
Instead of arranging by bottle color or height, organize around what happens when an item is used. One removable caddy can hold ordinary dishwashing supplies. A second bin can contain trash-bag rolls and dry accessories. Cloths should be clean and completely dry before they enter a ventilated container; damp rags confined in a cabinet can develop odor and make it harder to distinguish a plumbing problem.
Place heavier liquids low and upright so they are less likely to tip. Keep sprayers from catching on pipes, and leave room to grasp a bottle by its body rather than its trigger. Frequently used, appropriate products belong near the front. Less-used items should not form a hidden back row. If you cannot see a container’s condition and remove it without shifting plumbing-adjacent objects, the cabinet is carrying too much.
Door-mounted storage can be useful for light, nonhazardous items, but confirm hinge capacity, closing clearance, and lease rules. Nothing on the door should strike bottles, valves, or the disposal when closed. Hooks and racks need secure installation that matches the door material. A removable caddy is often simpler and keeps the architecture flexible.
| Item type | Placement question | Better setup |
|---|---|---|
| Daily dish supplies | Can one item come out without disturbing plumbing or other bottles? | Use one low handled caddy near the front, if labels and household access allow. |
| Liquid refills | Are containers upright, stable, closed, and easy to inspect? | Stand a small quantity in a shallow removable tray away from service points. |
| Dry accessories | Could a leak soak or contaminate them? | Use a washable bin, or relocate absorbent stock outside the cabinet. |
| Potentially hazardous products | Can a child or pet enter the cabinet, and what does the label require? | Use compliant restricted storage, which may mean a different room or locked location. |
| Plumbing tools | Would storing them here interfere with an urgent shutoff or repair? | Keep only a small applicable item at the edge, or use the basic home toolkit elsewhere. |
Plan for children, pets, and shared households
A cabinet latch is not permission to ignore label directions. Hardware varies in design, installation, and reliability, and it may not satisfy instructions that call for locked storage. Assess the actual people and animals in the home, including visitors. If someone can defeat the barrier or a pet can nose open the door, relocate hazardous products rather than treating the cabinet as automatically safe.
Tell other household members what belongs in each bin and what never goes below the sink. A small system fails when someone places an unmarked spray bottle in the back or returns a dripping sponge to a sealed container. Shared rules can stay concrete: original packages only, caps closed, no food, no wet cloths, and no item in front of the shutoff valves.
People who need cleaning products but have limited reach or mobility should not be forced to lift a crowded caddy from the floor. Consider a lighter caddy stored at an accessible height in another suitable area. Likewise, do not place hazardous materials high without considering spill risk and safe retrieval. Accessibility and hazard control need to be solved together, using product directions and the household’s circumstances.
Use a leak-aware maintenance loop
Attach cabinet checks to natural events rather than an arbitrary universal schedule. When replacing a detergent refill, pull out its tray and inspect beneath it. When the trash-bag bin empties, look at the cabinet floor and pipe joints. After plumbing work, check that all items were returned without blocking components and observe the area as directed by the professional who performed the work.
Your senses provide useful prompts, not diagnoses. Musty odor, water sounds when fixtures are off, new staining, insects, a warm component, or recurring dampness warrant investigation. Do not tighten unfamiliar fittings, disassemble a disposal, or work near electricity based on a generic tutorial. Follow the equipment manual, turn to building maintenance where responsible, or call an appropriately qualified plumber or electrician.
Keep a simple record when you notice a change. A dated photo of the dry cabinet floor and visible connections can provide a useful comparison if a stain expands or moisture returns. Record what fixture was running and where water appeared without reaching into an active leak or touching electrical components. This is not a substitute for diagnosis; it gives the responsible manager or professional clearer observations. After a repair, remove the caddies and inspect again according to the instructions you receive. If a tray catches liquid, treat that as a warning to investigate rather than proof that the storage system has contained the problem.
Pair this focused cabinet with the broader habits in a meal-centered pantry, while keeping food storage physically separate from cleaners. The two spaces work well when each has a narrow purpose: food and cooking inventory in the pantry, a limited set of sink tasks below the sink.
Common under-sink organization mistakes
- Buying organizers before measuring: a drawer tower may fit the width but collide with pipes, hinges, or the cabinet opening.
- Filling every gap: maximum capacity removes the visibility and access that make the space safe.
- Decanting cleaners for appearance: an attractive unmarked bottle loses directions, warnings, and reliable identification.
- Mixing categories in one deep bin: loose triggers, refills, rags, and tools become difficult to inspect and retrieve.
- Using a liner to conceal damage: a waterproof-looking surface can hide dampness without correcting its cause.
- Assuming low means convenient: floor-level storage may be unsafe for children, animals, or a person who cannot reach it comfortably.
- Blocking the shutoffs: decorative racks are not worth delaying access during a leak.
Frequently asked questions
Should cleaning products always go under the kitchen sink?
No. This cabinet is common, not universally appropriate. Product labels, local requirements, child or pet access, heat, moisture, and plumbing layout can all point to another location. Store only a small number of compatible, useful products when the setting meets their directions.
Are child-resistant latches enough?
Use barriers as their makers direct, but do not treat every latch as equivalent to locked storage or as a substitute for a product label. Consider the child’s abilities, visitors, installation quality, and pet behavior. Relocation is often the clearer answer when access remains possible.
Can I install a shelf around the drainpipe?
Only if it does not conflict with plumbing access, equipment clearances, the cabinet structure, or rental rules. Removable units are easier to take out during service. Never brace an organizer against a pipe or conceal a connection that needs observation.
What belongs in the easiest-to-reach position?
Place frequently used items there only after confirming they are suitable for the cabinet and safe for everyone who can reach it. Convenience follows safety. A light caddy may provide accessible daily supplies while restricted products live somewhere else.
How do I keep the cabinet from becoming crowded again?
Set a physical limit for each category and avoid storing backups beyond that limit. Return items to a defined caddy, remove empty packages promptly, and use refill moments as a reason to inspect the cabinet. If a new product enters, decide which existing item leaves or relocates.
Final takeaway
A successful under-sink cabinet is not the one with the most tiers, bins, or matching bottles. It is the one that respects product instructions, limits access to hazards, keeps liquids stable, and leaves the plumbing readable. Empty and inspect first, choose a small inventory, preserve service routes, and use removable zones that fit your actual cabinet. When the setup lets you find one supply and spot one drip without unloading the kitchen, the organization is doing its job.